Creating test apps for most platforms is generally quite straightforward with OpenFL, but iOS requires a little more setup. As such, in this blog we will go through the process step-by-step, so you too can test your OpenFL-based iOS apps.
Environment:
macOS Catalina 10.15.5
iPhone 6s on iOS 13.5.1
Xcode 11.5
Haxe 4.1.2
Lime 7.8.0
OpenFL 8.9.7-Lpv3od
- Install Haxe via:
Then, run the below in Terminal using the default settings:
haxelib setup
Then install OpenFL and Lime via Terminal (default settings in setup are fine) with:
      haxelib install lime
      haxelib run lime setup
      haxelib install openfl
      haxelib run openfl setup
- Test OpenFL is working with:
openfl
- Create a sample project/navigate to a project directory in Terminal:
      openfl create DisplayingABitmap
      cd DisplayingABitmap
- Ensure the project works normally:
openfl test neko
- Open the project into Xcode:
lime update ios -xcode
- Navigate to Signing & Capabilities via the project, underneath TARGETS:

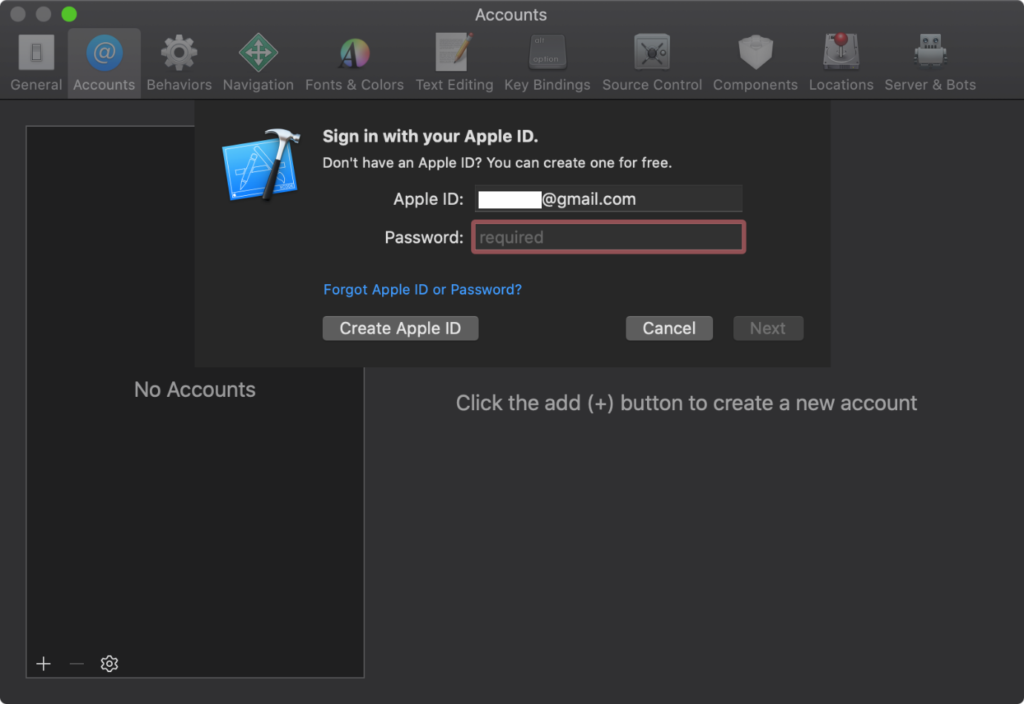
- Click “Add (an) Account…” next to Team/in the team dropdown and login to an Apple ID:
- Shortly, the status will update and may include the errors below:

To fix these, simply change the Bundle Identifier to something unique (note that the same Bundle Identifier should be used per-project), then click “Try Again”.
- Select the testing device (assuming a physical device for this example) from the [Project name] > [Testing device] dropdown in the toolbar:
- Click the Run button in the left of the toolbar and unlock the device:

- An error will likely appear.
To fix this, on your connected device, navigate Settings>General>Device Management>Apple Development: [Apple ID] and select “Trust ‘Apple Development: [Apple ID]’”, then “Trust”. The app should be listed as “Verified” (otherwise there should be a “Verify” button):

- The app should now be able to launch from the homescreen and by running through Xcode (don’t uninstall the app from the device when running through Xcode, otherwise it may have to be trusted again as per 11 – it should just update automatically). However, this error may also appear in Xcode, with a blank screen on the device:
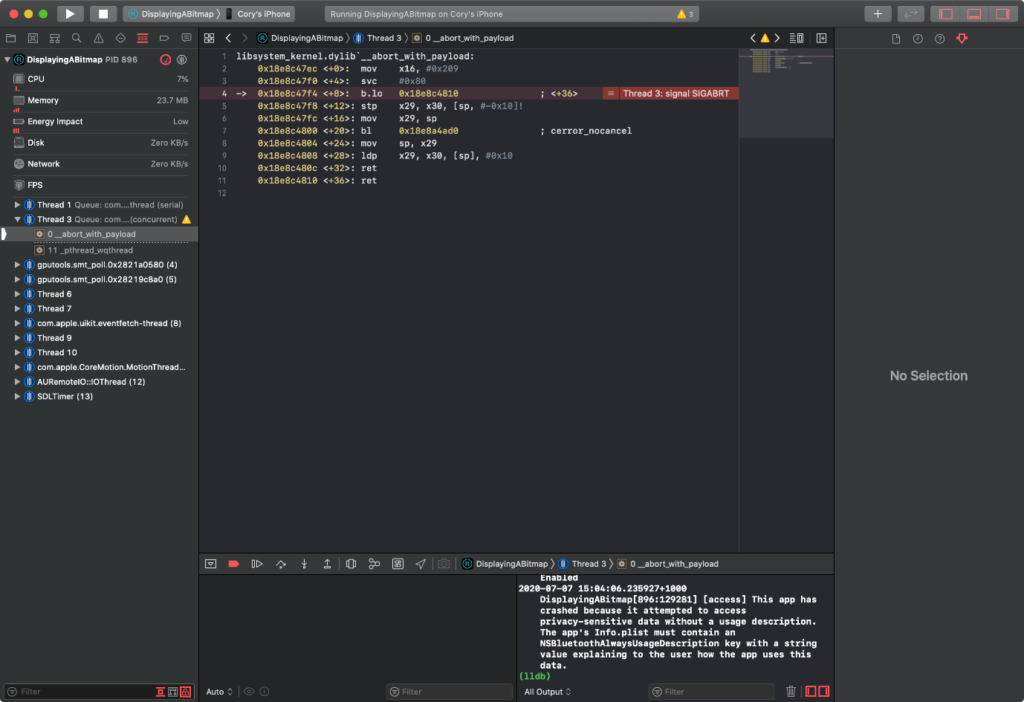
The solution here is to navigate to Project (the folder icon in the left window)>Resources>[Project name]/[Project name]-Info.plist where you can click the plus icon next to “Information Property List” and enter “NSBluetoothAlwaysUsageDescription”, then press <Enter>:

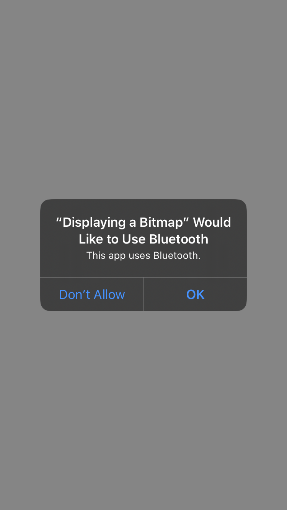
The string entered in the Value column for the Key you just added (now titled “Privacy – Bluetooth Always Usage Description”) is what will appear when the app asks for Bluetooth permissions, so enter something appropriate.
Note: It is unclear why the app requires Bluetooth permissions, so this should be investigated before a release build.
- Run the app via Xcode again (again, be sure not to uninstall the app from the device, or you may need to repeat 11), and the app should now work correctly.

Note, that utilising other parts of iOS that require permissions will also likely require editing the Info.plist file again, and possibly also editing Capabilities in the Signing & Capabilities page.